photoshop怎么制作风中飞扬的薄纱 photoshop制作风中飞扬的薄纱教程
作者:本站作者 人气:大家知道如何用photoshop制作风中飞扬的薄纱吗,不清楚的小伙伴没关系。下面小编就为大家详细的介绍一下,大家感兴趣的话就一起来了解下吧!
photoshop制作风中飞扬的薄纱教程分享
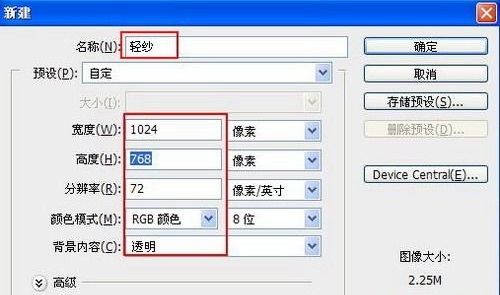
步骤1 文件新建,设置如下:
步骤2 为了便于观察操作,将其填充为黑色

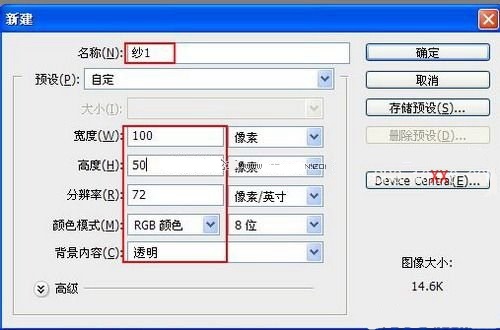
步骤3 文件 新建,设置如下:
步骤4 使用“钢笔工具”,勾出纱窗横截面的轮廓路径;单击“画笔工具”设置如下:

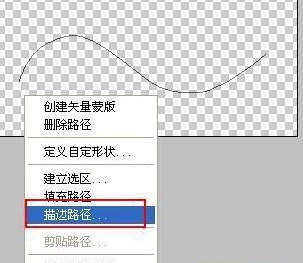
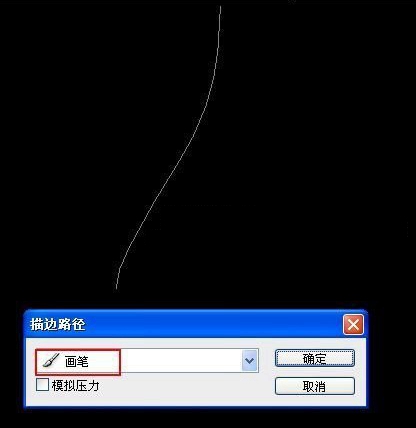
步骤5 单击“钢笔工具”,然后鼠标右键单击画布,选择“描边路径”
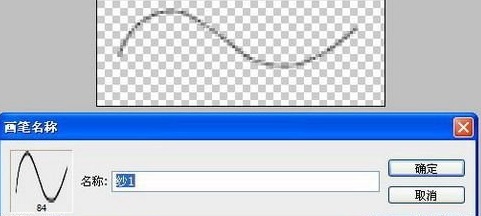
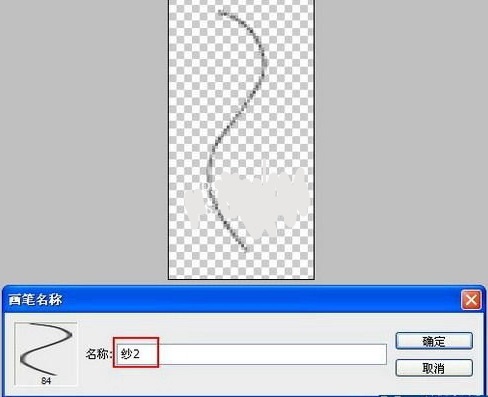
步骤6 在弹出的对话框中选择“画笔”,执行编辑》定义画笔命令;在弹出的对话框中输入“纱1”:
步骤7 执行图象》旋转画布(90度顺时针),继续执行定义画笔,输入“纱2”
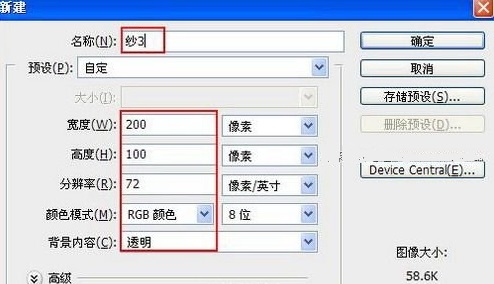
步骤8 文件》新建,设置如下:
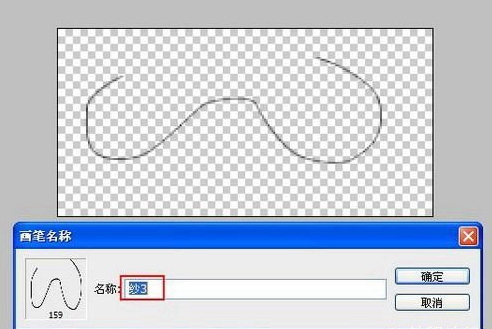
步骤9 重复步骤4,5,6 , 最后结果如下:
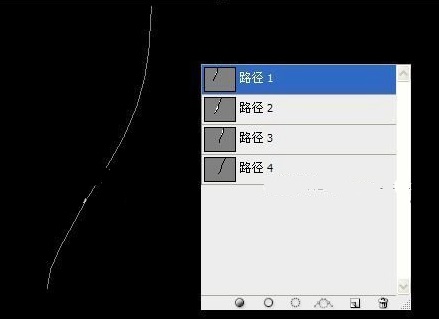
步骤10 回到“轻纱”文件,打开路径面板,分别新建“路径1”“路径2”“路径3”“路径4”,使用“钢笔工具”勾出纱窗不同走向的路径;
步骤11 单击“画笔工具”设置如下:
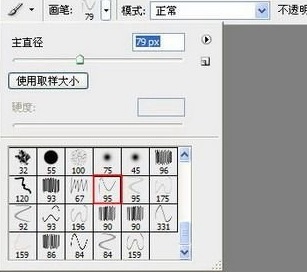
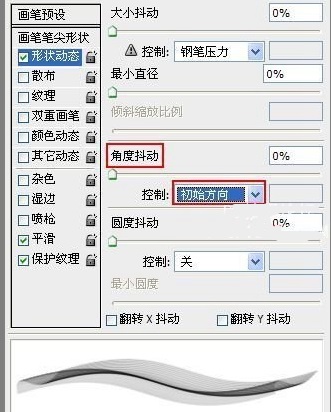
步骤12 单击“画笔调板”按钮,设置如下:

步骤13 回到图层面板 分别新建“图层1”“图层2”“图层3”“图层4”,对“图层1”进行操作,选择“路径1”单击“钢笔工具”,选择“描边路径”,在弹出的对话框中选择“画笔”
步骤14 对“图层2”,“图层3”,“图层4”同样执行“图层1”的操作,可以结合使用“自由变换”调整角度与图层的关系 得到一条新的窗纱 完成后的效果如图
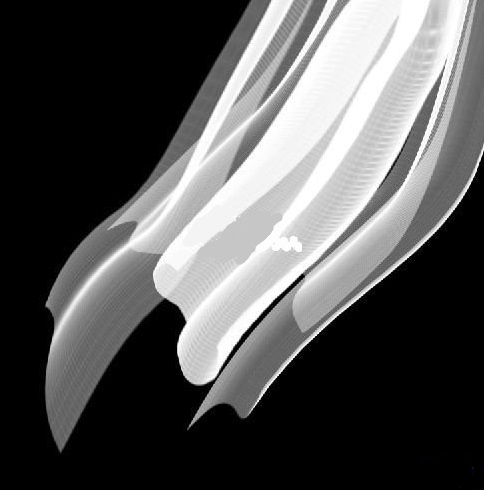
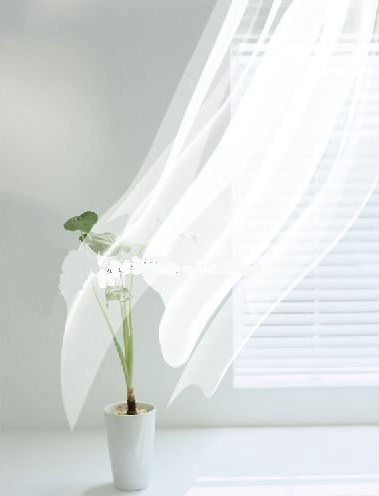
步骤15 制作好的窗纱拖到“素材1”中,进行调整。最终效果如图
以上这里为各位分享了photoshop制作风中飞扬的薄纱教程,有需要的朋友赶快来看看本篇文章吧。
 Adobe Photoshop Express
 imgcook
 Photoshop CC 2019
 photoshop启动界面修改工具(图文教程)
 ps8.0下载中文版免费破解版
 麒麟PS盒子
 PS切图插件(Cutandsliceme)
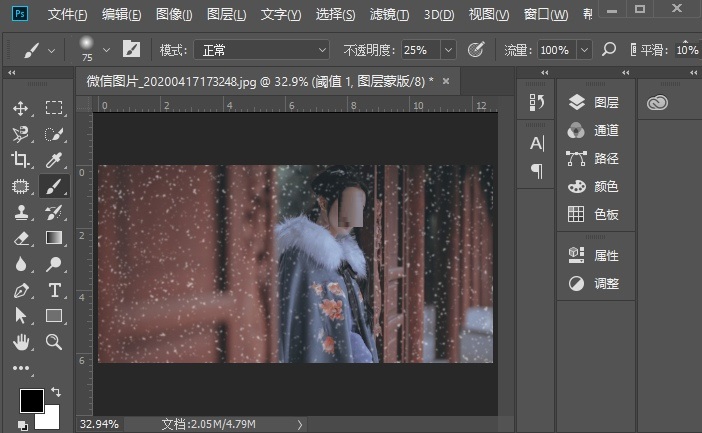 如何用Photoshop给古装人像照片添加雪景效果 照片添加雪景效果教程介绍
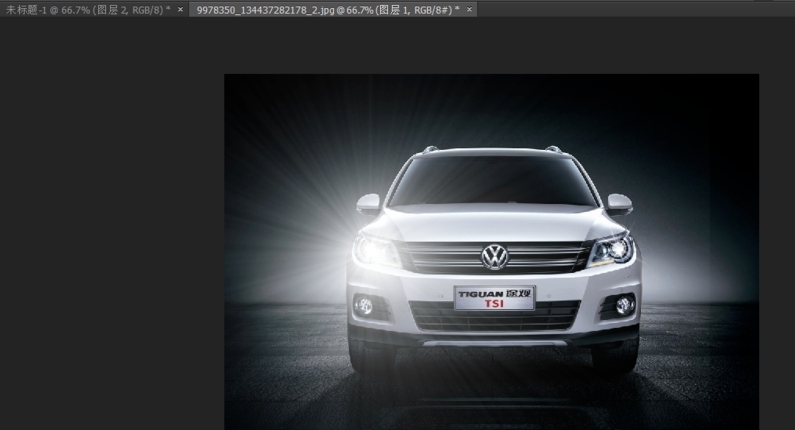 如何用Photoshop制作汽车射灯效果 Photoshop制作汽车射灯效果教程
 photoshop海报滤镜云彩光照效果怎么做 photoshop海报滤镜数值设计教程